Now that I have tackled my mound o'scarves with that fabulous old ladder (post here), the next order of business had to be the pile of tangled baubles that was found underneath all of those scarves! Obviously I do LOVE my accessories, but they usually are such a mess I either can't find or forget about most of the pieces because they are such a disaster. So I decided it was about time to be grown up and have some sense of order, very mature huh??? :)
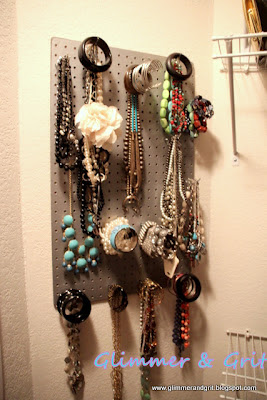
This piece of peg board is left over from when I made the play workbench for my little guy (post here) so I figure it was free to me :) Hey in my mind that works!!! But even if you have to go buy a piece at Lowe's or Home Depot it is less than $7 for a big piece that you could have them cut it in half to make two or if you have a really big wall and lots of "stuff" use the whole thing.
All I did was sand the corners a little to round them out and even up the sides form my not so perfect cutting job last year.
You could just leave it white or pick any color your heart desires. I decided to try this hammered silver from Rust-oleum.
Two quick coats of the paint and that's it we are ready to hang it up.
For the jewelry hooks I used these very inexpensive peg board hooks from Walmart. You can find them near the nails and screws in the hardware section and for all 15 hooks it was less than $6. I just slipped the red plastic off the ends, only because I didn't want them on and spaced them out on the board. Depending on how you hang you board you may want to put the hooks in first before you attach it to the wall because the hooks need some space between the board and the wall to secure in place.
Then start hanging things up....
and finally step back and give yourself a little pat on the back! For the first time in years, OK lets me honest for the first time in FOREVER my jewelry is actually organized and I can see what I have instead of grabbing the first thing I see that doesn't look like a toddler tied it in 35 knots!
This was another one of those angled wasted space walls in my closet so I used three nails right down the middle to secure it to a stud and also used some of those handy command strips that are super strong little veclro pieces at the two top corners just to be safe. Actually securing things into studs is always my goal, but not always how it turns out and the last thing I want is for this to come crashing down in the middle of the night.. not that that has even happened or anything ;) To really finish it off you could add a frame, but I like it as is and didn't want to waste any of the board space with a frame.
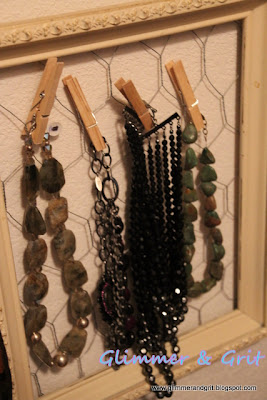
This is the opposite wall with the ladder that I showed you earlier. Since then I've added the rug, a few hats at the top and finally hung the two frames I've had sitting around for months to fill out the space next to to the ladder.
They are just thrift store frames painted and distressed with some chicken wire on the back.
These are also great for earrings! For now I'm using inexpensive clothes pins to keep the necklaces in place.
I hope these give you some ideas to help organize all those "necessary" collections we all have and can't bring ourselves to part with because I "might" wear that someday :) It is an accomplished feeling for this crazy mom to look at my closet and not cringe, I'm off to have a cup of coffee and maybe just stare at the little corner of peace in this place.... while it lasts :)
Lindsey


No comments:
Post a Comment