Showing posts with label Recipes. Show all posts

Monday, April 7, 2014

Double Chocolate No Flour Cookies


Happy Monday!!! In my world, it's always a good day for chocolate.. ALWAYS! So I'm sharing with you today a recipe that a friend turned me on to a few weeks ago and our entire family is totally hooked.  I've made them 4 times in 2 week, yes we have very well documented chocolate issues!!!  But these are so good you probably will too, so sorry in advance!


The original recipe is from this great gluten free site, I tweak it just a little but the original is great too. We are not a gluten free family, but the way I do "food math" I figure if you cut out something not so great for you you can add more chocolate or eat three cookies instead of one! Makes sense right??? Yes, I get whipped cream on my non fat iced latte.. don't judge!

Double Chocolate No Flour Delights
1/2 cup softened butter or coconut oil
1/2 cup brown sugar
1/2 cup white sugar
1 egg
2 teaspoons vanilla
1/2 teaspoon baking soda
1/2 teaspoon salt
1 cup cocoa powder
1 cup semi-sweet chocolate chips 
(or just dump the whole bag in.. food math remember)


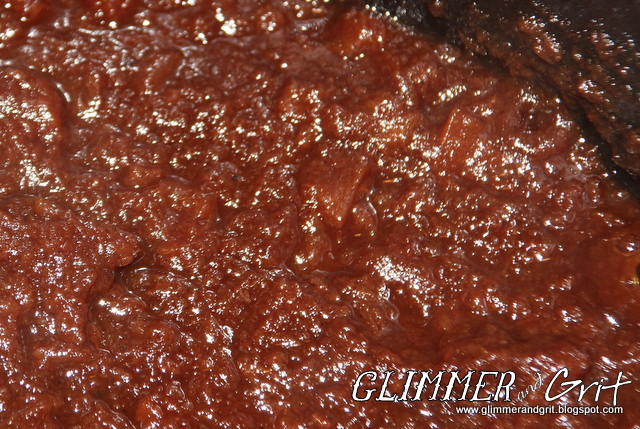
Mix all ingredients except chocolate chips, it will be thick just do your best to get it incorporated then mix in the chocolate chips.


Spoon the extra thick chocolate goodness onto a baking sheet, bake at 350 degrees for about 14 minutes.


Because the dough is so dark it can be hard to tell when these are done so watch them closely, if you over cook they are very brittle.. still delicious just a little messy.


Even at 14 minutes, they are still gooey and easily breakable when you first take them out of the oven, so I like to bake them on parchment paper and just pull the whole paper, cookies and all off the tray to cool.  Once they cool and set up a few minutes they stay together perfectly and are AMAZING!


See, chocolate on chocolate to die for "ness".  I know that is not a condition, but it should be!


And because of the unsweetened cocoa powder and the semi-sweet chips, these are rich and delicious but not overly sweet.


This recipe makes 18-24 cookies depending on how big you make them.  It is quick and easy to whip up when you want something sweet. I now keep an extra large tub of cocoa powder on hand so we always have the few simple ingredients for our new favorite treat!

Enjoy,


Monday, September 2, 2013

Homemade Frozen Cookie Dough


First, thank you to those who have hung with me and this little blog this summer despite my lack of posts.  I promise I have been busy with projects!  The ever present streak of paint in my hair and on every piece of clothing I own is proof, but after the sanding, painting, messing and wrestling the kiddos, actually blogging about it at the end of the day loses out to sleep every time.  But as a thank you and a promise that there are some good projects coming, I thought we should indulge our sweet tooth.  I mean there is never a reason not to do that right???


This is no ground breaking idea, but it is one that I never thought to do until a friend recommended it to me and I am hooked.  In our house chocolate chip cookies are king!!!  They are my hubbies favorite and he seems to always request them at the most random times when that is the last thing I want to do.  So when my friend told me she makes a big batch freezes them in pre-measured balls and then always has them on hand I thought... GENIUS!!! 


So I did just that, I usually use the basic cookie recipe on the back of the toll-house bag plus lots of extra vanilla, but use any recipe you like.  Then use a cookie scoop and portion our your cookies on a sheet tray, packing them in as tightly as possible without touching.  Then slide this bad boy into the freezer for a few hours so that the dough starts to freeze in the ball then when you transfer them to zip lock freezer bags they won't stick together.


Finally, put this bag of goodness far back in the freezer, hidden from view so no one finds your stash.  Then when your husband wants cookies at 10:30 at night, or your get an intense NEED for chocolate (basically every day in my word) all you have to do is turn on your oven pop a few on a baking sheet, add a couple minutes to your normal baking time and presto you have fresh, delicious, hot, homemade cookies without the dirty dishes.

Another plus, if you only make a few at a time you aren't tempted to eat half a dozen in one sitting like me... on the other hand that oven does re-heat pretty quickly if you decide you NEED just a few more :)

Enjoy,


Tuesday, June 25, 2013

Best Chocolate Cake EVER


I love chocolate!!! I can't deny it, so I freely admit it.  My husband on the other hand claims he's not a "sweets guy" but then sneaks into the pantry or freezer for just a "little something sweet" every night!  MEN, ughh!  It's not fair, how do they eat like that and still look great???  The one time my wonderful hubby will admit he wants something sweet is his birthday and it's always the same request.. chocolate cake with chocolate icing.  So for years I have tried different recipes, and while they were all good (I mean it's sugar, butter and chocolate how can they not be?) a little over a year ago I stumbled onto one that with only a few minor tweeks got rave reviews from the "not a sweets guy" and everyone else I've made it for.  It's dense, but moist, not overly sweet but so good you will want to lick the plate and sneak a second piece when no one is looking :)


The original recipe is from Ina Garden (Food Network's Barefoot Contessa) here is the link to her recipe.  Ina is a stickler for sifting everything and only using fancy specialty store quality ingredients, but I'm not really that picky so I made the cake using good old generic and store bought chocolate and skipped the fuss and it was still fantastic. I also added extra vanilla and a little bit more sugar to the frosting because I used semi sweet chocolate baking squares from the grocery store instead of a fancy bar, but I think the less expensive version is too good to mess with the other :) 


Ingredients

1 3/4 cups flour
2 cups sugar
3/4 cup cocoa powder
2 teaspoons baking soda
1 teaspoon baking powder
1 teaspoon salt
1 cup buttermilk
1/2 cup vegetable oil
2 eggs
2 teaspoons vanilla
1 cup hot coffee

In your electric mixer or large bowl combine the flour, sugar, baking soda, baking powder and salt.  In another bowl combine the buttermilk, oil, eggs and vanilla.  With the mixer on low slowly add the wet ingredients to the dry, then slowly pour in the hot coffee just to combine.  Pour the batter into two greased and floured round pans and bake at 350 degrees for 35-40 minutes, until a toothpick comes out clean.  Cool in the pans for 30 minutes, then transfer to a cooling rack and cool completely.

For the icing beat two sticks of room temperature butter on medium high for a few minutes until fluffy, then add one egg yolk, 2 teaspoons vanilla and beat another three minutes.  Now with mixer on low, slowly add 2 cups of confectioners sugar scrapping down the sides of the mixing bowl to make sure it is all combined.  Next, dissolve 1 tablespoon of instant coffee crystals in 2 teaspoons of hot tap water.  Finally add the coffee and 6 ounces (or 6 squares) of melted semi sweet baking chocolate (using a bowl over boiling water works best so you don't scorch the chocolate or a microwave if you do it slow and be very careful) into the other ingredients. 


I'm no baking expert and as you can see my cake decorating skills or lack there of are pretty sad, but it still tastes AMAZING!!!  Thankfully, that makes up for my poor presentation, or at least I hope so ;)

Enjoy,

Tuesday, April 23, 2013

Creamy Dreamy Coconut Dessert


My sweet next door neighbor is 89 years young, full of stories (she had 10 kids!!) and amazing recipes.  She made this Coconut Torte, as she calls it for my husband to welcome us to the neighborhood and I'm not joking not only did he eat the entire thing, I'm pretty sure he licked the plate when he was done!  It's creamy, dreamy and the delicious crust adds the most amazing texture.  So after months of visiting her and growing more in awe of how she managed such a big family I finally remembered to ask her for her recipe which she graciously gave me out of an old family cookbook.  I immediately ran home and made it.  After devouring an embarrassingly big piece of this heavenly treat, I'm now in a food coma and I'm sharing it with you all so you too can be in sugar bliss!


Ingredients

Crust:
1 1/2 cups flour
2 cups walnuts
1 stick butter

1st Layer:
8 oz. cream cheese
1 1/2 cups powdered sugar
1 container Cool Whip
1 cup coconut

2nd Layer:
4 small packages instant coconut pudding mix
6 cups milk (use part half and half if you are feeling really decadent)

3rd Layer:
1 container Cool Whip
2 cups flaked coconut


For the crust, mix the finely chopped walnuts, flour and melted butter and then press firmly into an even layer in your cooking spray coated pan and bake at 350 degrees for 15-20 minutes.  I used a regular 9x13 glass cake dish which is great if you need to make this for a crowd because it makes a lot.  But, if you have little to no willpower like me you may want to split it into two smaller pans and share one with a friend :) Getting this out of my house is the only way I can get it out of my mouth!!! 


While the crust is cooling you can mix up the next layers.  For the white cream cheese layer, cram the softened cream cheese and powdered sugar until smooth then stir in the Cool Whip and coconut until combined.

For the pudding layer, whisk together the milk and instant pudding and set aside until thickened.  You are basically following the pudding package directions but instead of using 8 cups of milk for 4 packages you are using only 6 so it is extra thick and rich.  If you happen to grab the cook and serve coconut pudding instead of the instant (which I did), don't worry just cook the milk and pudding mix on the stove according to the directions and let it cool, it takes a little longer but will taste the same.

Now that your crust is baked and cooled, smooth on the cheese layer, then the pudding layer and finally top off with the last container of Cool Whip and sprinkle with the rest of your shredded coconut.  Pop it in the fridge to fully set and enjoy.  This keeps great in the fridge for several days, so you can totally make it ahead to save yourself time on the day of a get together, but beware you may have to hide it way in the back because if anyone sneaks a taste, keeping them out of it may be nearly impossible!  I'm speaking from person experience!!!  


Yes, there are a few steps, it is very rich and the ingredients make this a little more expensive than your average dessert, but for a special treat this is well worth the time and money.

Hope you love it as much as we do!

Enjoy,


Sunday, February 3, 2013

Homemade Hashbrowns


Since my recent attempt at freezing avocados (tutorial here) was such a simple and successful project, I decided to roll the dice and yet again.. and I'm so glad I did!


My cute little local store where I bought the avocados for such a steal the other day also had a 10 pound bag of potatoes on sale for 89 cents!  Too good to pass up I bought a bag, but with my hubby out of town and me attempting to really give my all to my dive into the world of "CrossFit" workouts (my sore muscles are hating me, but that's for another post) potatoes unfortunately are not really my friends right now.  So not wanting to waste my great bargain like I usually do I decided to try freezing them.


There are a lot of great posts on the web that call for peeling, soaking and or boiling, I decided instead to take the easy route and just gave them all a good scrub and a few pokes to help them cook.


Then right onto the oven rack at 350 degrees.


Bake until they are soft, the time will depend on the size of your oven mine only took about 30 minutes.


Now let them cool, then grab a grater and shred away.  The beauty of being lazy and leaving the peels on is it gave me something to hold onto saving my fingers from the blades.  Plus, the potatoes basically peeled themselves because the flesh shredded easily and most of peel stayed in my hand.  


To keep your hashbrowns from becoming a potato brick in the freezer spread them in a thin layer on baking sheets and freeze for about an hour then transfer to freezer bags.  This gives the pieces a chance to start to freeze before being smashed into a bag.  If you skip this part, like I'm sure I would if I was reading this I can't imagine there would be a big problem you will probably just have to take them out of the freezer a little sooner to give them an extra chance to thaw before trying to work with them. 


We don't eat hashbrowns very often, but they sure are nice to have in the freezer when you have company or need to throw together a last minute meal.  For 89 cents, and barely any work I got three big gallon ziplock bags full of already cooked, ready to use potatoes.... not too shabby!  

So next time you see a great deal or have potatoes that are destined for the trash, heat up your oven, grab a box grater and save them... and the day!

Enjoy,

Monday, January 28, 2013

Freezing Avocados

Avocados... I LOVE them, but hate the price.  You know what I hate more???  When I pay a dollar or more a piece for them and then let them go bad on my counter!  Ugghhh!!! I'm convinced the "avocado fairies" come to my house overnight and turn this incredible fruit (yeah totally pulled that fact out just to sound smart :) from rock hard to mush in a matter of hours.  Dang those "avocado fairies'!!!  If they have even made an appearance at your house I have the answer.... freeze them! Not the fairies, the avocados and yep, you can totally do that!
Even if you are better at keeping an eye on your avocados this is still a great trick.  The little store in my town recently had a special, 3 avocados for 99 cents!!! Amazing right?!? I wanted to take advantage of the great deal, but was afraid to stock up for fear those dang "fairies" would appear.  So I decided to try freezing them and it turned out amazing.  From now on I will always stock up when I see a great deal and will never waste them again.. or at least I'm going to try not to waste them.
To save your avocados from the trash in the nick of time all you have to do is scoop out the gorgeous green flesh, mash it up and add a little lemon juice to help keep the color.  I used nine avocados and a couple splashes (a few teaspoons) of lemon juice.
Now, fold over the edges of your freezer zip lock bag to make sure you keep the seal clean and scoop in your mashed avocado.
Carefully press out as much air as possible, seal it up and throw it in your freezer.
When you need avocado just pull one out and let it thaw in the fridge overnight (or if you are a horrible procrastinator like me thaw a bag in a bowl of warm water).  It tastes amazing and if you like to make homemade guacamole half the work is already done!  Here's to not letting those sneaky "fairies" win!

 Enjoy,


Wednesday, November 21, 2012

Simple S'mores Bars

We recently had a party at our house for my husband's work, of course I handled the announcement from my husband that we were hosting a party TOMORROW with calm, cool class!!!  Yeah, right!  I had a moment or two of sheer panic and thought seriously about causing my husband bodily harm, but we ended up having a really fun night with some great friends and I'm so glad we had the party.  That being said I was racing around trying to think of some last minute things to make and I remembered seeing some s'mores bars on pinterest, but sadly when I went to the pin that post was gone... don't you hate that when that happens??? 

So like most women, I totally winged this in five minutes and it was a huge hit!!!  Instead of standing around our fire pit with sticky fingers and kids covered in marshmallows we got to have the S'mores experience without the mess and it could not have been easier!
First, I sprayed a sheet pan with cooking spray to make life a little easier in the end, then spread out 12 graham crackers, side by side, six on each side and covered them with a bag of mini marshmallows.  Don't worry about being perfect, just throw them on.
Next, melt chocolate almond bark, candy melt or good old chocolate chips (whatever you have on hand) in the microwave with a few spoons of coconut oil to help loosen it up a bit and make pouring a little easier.  I used one whole block of bark, melting half at a time in the microwave at 30 second intervals with a scoop or two of the oil.  You could also use shortening or vegetable oil, but I love the flavor that coconut oil adds.  Once the chocolate is melted slowly pour it over the top of the marshmallows, again don't worry about being perfect just pour it on and use a spoon to spread it out if you need.  You just want all the marshmallows covered in chocolate, because that is the "glue" that holds everything together.
Now just let it cool, or if you are super impatient like me put the entire pan in the freeze to help speed things along.  Then cut them in whatever size pieces you like and enjoy!
       They turned out so cute and o one knew they took all of 5 minutes to make.  We will definitely be making them again very soon!
So if you have last minute guests, snack duties or just need a chocolate fix... don't strangle your husband, just take a deep breath grab these few ingredients and in no time you will be in a chocolate induced happy place that no bad mood can penetrate! 

Enjoy,

Monday, November 12, 2012

Crock Pot Apple Butter

Apples, apples I've got so many apples I'm surprised I'm not dreaming about them.  Don't get me wrong, I'm NOT complaining!  We went apple picking and got a ton of apples and even after making jars and jars and jars and jars and jars and jars of homemade apple sauce I STILL HAVE APPLES!  So I made a few apple pies to stick in the freezer, but you guessed it... drum roll I still have apples.  So I am using some of my applesauce and the remaining apples to make what has become a family favorite and staple in our house, homemade apple butter.  

If you've never had apple butter, don't worry I hadn't either until a few years ago.  And don't be fooled by the name there is no butter involved, just smooth delicious apple goodness that cooks down for hours and hours making your house smell incredible and the end result is so good you could slather it on just about anything!


Ingredients:
2-50 oz jars unsweetened applesauce (store bought or use my easy no peel/no sugar homemade recipe found here)
10-12 apples peeled and cut into small cubes(Granny Smith are my favorite in this because the tart balances the sweet, but any you have will be great)
4 cups sugar (brown or regular I like to do half and half)
1 1/2 cups apple juice
2 tablespoons cinnamon
2 teaspoons all spice
2 teaspoons ground cloves

To make dump all these ingredients into a crockpot, pop on the lid and forget about it for about 24 hours.  Most recipes say 8-9 hours, but I've been tweaking this recipe for three years now and I think the longer the better.  This recipe fills a large crock pot, if you have a smaller one you may want to do half at a time.  Also this is what I like to call "super spiced", I like to add lots of cinnamon, all spice and cloves, but you can start with half the amount and add more towards the end if you are worried it may be too strong.  I used to start with less but ALWAYS added more, so now I just dump it all in at the beginning and forget about it.
This is the goodness after about 8 hours, you can still see come chunks of apple but look how much it cooks down!  I like to start this in the afternoon/evening and let it cook overnight.  Give it a stir once in awhile while you are awake, but go to bed with no worries because you will wake up to a house filled with a sweet smell that beats the pants off of any fancy candle on the market!  My humble opinion of course.
After it has cooked about 8 hours (I do overnight) take your crockpot lid and turn it about a quarter turn if you have a large oval shaped one or just move the lid over a bit so the steam can escape and the apple mixture can reduce and thicken up.  But at this point reward yourself with a taste or better yet a little scoop of the hot apples over ice cream... it's AMAZING!
By now the chunks of apples have cooked down into this smooth, thick, rich concoction that I think you and your family will love.  If your apples started off as bigger pieces you may still have a few chunks (we still really like it that way)  but if you prefer the finished product to be super smooth just give it a quick mash.
Eat it right away, which trust me will not be hard, or it will keep in your fridge for several weeks.  
We put this on toast, biscuits, sandwiches and even ice cream.  I like to water bath can this and give it as gifts.  This recipe makes about 6 pints, I usually make two big batches back to back so that I can stock up while I have all the ingredients on hand.  It does take some time, but it's easy and inexpensive to make but the end result is a really special gift.
Break out your crockpot and get this started today.  Or make it the night before your company arrives for the holidays, they will walk into a house that smells divine and you will be able to share the fruits of your very minimal labor with them.... psss you can leave the "minimal labor" part out... what they don't know won't hurt them and will send some much deserved praise your way!

Enjoy,