

I know nothing about pianos which I realize is an odd way to start a tutorial about a piano, but to be completely honest and to prove my ideas sometimes do start out as certifiable craziness but somehow, most of the time they work out.. so here goes my confession, I've never owned a piano, in fact I can't play a single song, but when I saw a wood piano painted turquoise about a year ago I knew I "HAD TO HAVE ONE"!!! So I patiently watched the classifieds and craigslist, waited until my husband was overseas (haha), and then this summer I found one... for FREE on craigslist!!!

This old gal, I've named her "Penelope", works great, had recently been tuned and the previous owners whom I'd never met but happen to live just up the road from me, even delivered it all for free, but cosmetically "she" had seen better days.
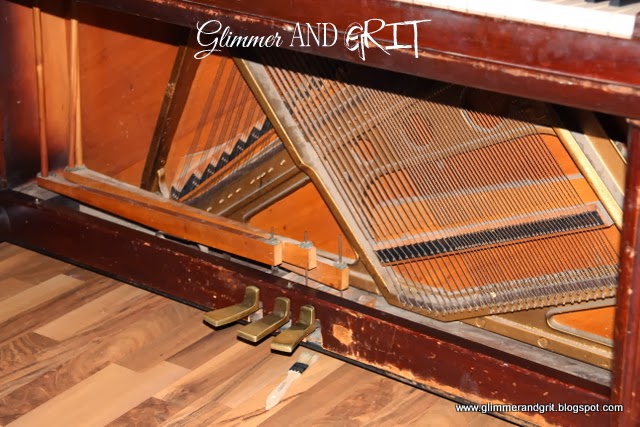
A couple keys were stuck, the hinges on the top were broken, another piece covering the keys was no longer attached and the board above the foot pedals was missing. But thanks to a you tube video on how to fix stuck keys (where would we be without you tube???), a piece of scrap wood, some sanding, wood fill, more sanding, lots of cleaning and paint... in 24 hours my piano went from junk....

... to a GEM!

Here it is with the broken pieces taken off and wood fill drying in the nooks and crannies that needed some repair. That strange black hose in the corner is my trusty shop vac, it got a workout on this project! I did everything right where it sat in my house, which four big burly men placed there when they took it off the trailer, because I didn't want to mess with moving it.

Once the wood fill was dry and hardened, I carefully took out all the keys, lifting them out one at a time, keeping them in order on my guest bed to make putting everything back properly a little easier, because remember me and piano aren't acquainted!
Next I used my shop vac to suck out ALL the dust, and debris that had fallen under the keys over the years. I found $1.14 in change, 7 hair pins, lots of dust, lint and dirt and a matchbox car... no kidding I have no idea how it go tin there! I'm so glad I took the time to take the keys out and really clean it. I knew this piano was a treasure, but never imagined all that would also come with the deal :)
And as a bonus having the keys out made painting really easy. I know originally I said I wanted a turquoise piano and I do, but because of my furniture painting addiction my house is full and this would only fit in one spot on a wall near my dining room and turquoise just wouldn't work, so instead I went for this great yellow, which these pictures don't do justice... sorry about that. The paint I got at Home Depot for $7 a gallon, it was a mis-tint that someone else didn't want... so I grabbed it! It's a great way to save money on paint if you aren't set on one color.. just ask at the paint counter next time you are there and see what mis-tints they have on hand you might get lucky.
If you have read any of my other blog posts you know I love Annie Sloan Wax, its AMAZING! I've recently stumbled across the most amazing antique store and Annie Sloan distributor in Olympia, Washington, Courtyard Antiques (link here) if you are ever in the Seattle area you have to stop in and check out all the amazing treasures! The fabulously talented owner, Mary, has inspired me to finally take the plunge and work with the Annie Sloan paint, and I'm so excited.. so stay tuned.
But this project I did before meeting her, and because I trying to save money anywhere I could, I made my own chalk paint by mixing one part plaster of paris with warm water until it dissolved and then mixed in three parts paint, stirred again to combine and painted away. The beauty of chalkpaint, no priming, just make sure the surface is wiped clean and paint!

While the first coat was drying I cut a piece of scrap wood we had from another project to fit the empty space in front of the foot pedals and then painted it as well.

After the second coat was dry, I put the keys back in and replaced all the now painted loose wood pieces.

TAH-DAH!!! My now fabulous yellow piano. I can't wait for my kiddos to learn to play, they already love "playing" it.

The art gallery wall is in progress, but I couldn't wait to give you an sneak peak. With the addition of some twine and clips, these recently painted empty frames from my stash will soon be the perfect spot for my kiddos art work. Stay tuned for the tutorial!
But back to the piano, not too shabby for about a buck in paint.. well actually I did find that $1.14 in the keys so I guess I made 14 cents painting this puppy!!!

If you have an old piano or just have a burning desire like me to get one, don't be afraid to paint it and give it a new life. This took me less than 24 hours, and even my husband, who wasn't in the car 15 seconds after getting off a plane before my 4 year old totally ratted me out... "Daddy guess what we got a piano!", good thing he likes it or just tolerates my crazy, either way... PHEW!

So instead of that hand me down being an eye sore, PAINT YOUR PIANO and you will be the envy of all your friends!
Enjoy,

No comments:
Post a Comment