Tuesday, June 25, 2013

Best Chocolate Cake EVER


I love chocolate!!! I can't deny it, so I freely admit it.  My husband on the other hand claims he's not a "sweets guy" but then sneaks into the pantry or freezer for just a "little something sweet" every night!  MEN, ughh!  It's not fair, how do they eat like that and still look great???  The one time my wonderful hubby will admit he wants something sweet is his birthday and it's always the same request.. chocolate cake with chocolate icing.  So for years I have tried different recipes, and while they were all good (I mean it's sugar, butter and chocolate how can they not be?) a little over a year ago I stumbled onto one that with only a few minor tweeks got rave reviews from the "not a sweets guy" and everyone else I've made it for.  It's dense, but moist, not overly sweet but so good you will want to lick the plate and sneak a second piece when no one is looking :)


The original recipe is from Ina Garden (Food Network's Barefoot Contessa) here is the link to her recipe.  Ina is a stickler for sifting everything and only using fancy specialty store quality ingredients, but I'm not really that picky so I made the cake using good old generic and store bought chocolate and skipped the fuss and it was still fantastic. I also added extra vanilla and a little bit more sugar to the frosting because I used semi sweet chocolate baking squares from the grocery store instead of a fancy bar, but I think the less expensive version is too good to mess with the other :) 


Ingredients

1 3/4 cups flour
2 cups sugar
3/4 cup cocoa powder
2 teaspoons baking soda
1 teaspoon baking powder
1 teaspoon salt
1 cup buttermilk
1/2 cup vegetable oil
2 eggs
2 teaspoons vanilla
1 cup hot coffee

In your electric mixer or large bowl combine the flour, sugar, baking soda, baking powder and salt.  In another bowl combine the buttermilk, oil, eggs and vanilla.  With the mixer on low slowly add the wet ingredients to the dry, then slowly pour in the hot coffee just to combine.  Pour the batter into two greased and floured round pans and bake at 350 degrees for 35-40 minutes, until a toothpick comes out clean.  Cool in the pans for 30 minutes, then transfer to a cooling rack and cool completely.

For the icing beat two sticks of room temperature butter on medium high for a few minutes until fluffy, then add one egg yolk, 2 teaspoons vanilla and beat another three minutes.  Now with mixer on low, slowly add 2 cups of confectioners sugar scrapping down the sides of the mixing bowl to make sure it is all combined.  Next, dissolve 1 tablespoon of instant coffee crystals in 2 teaspoons of hot tap water.  Finally add the coffee and 6 ounces (or 6 squares) of melted semi sweet baking chocolate (using a bowl over boiling water works best so you don't scorch the chocolate or a microwave if you do it slow and be very careful) into the other ingredients. 


I'm no baking expert and as you can see my cake decorating skills or lack there of are pretty sad, but it still tastes AMAZING!!!  Thankfully, that makes up for my poor presentation, or at least I hope so ;)

Enjoy,

Monday, June 24, 2013

Painted Wood Island Re-Do


A few weeks ago I decided that I didn't like the set up in my house so much to my husbands shock I started moving everything around.  You know sometimes a girl just needs a little change :) But in the process of moving things around this wall near our front door was empty, so I decided to take an old island that we weren't using and solve my empty space situation!  It was a quick afternoon project and I really love how it turned out.  It truly is amazing what a little paint will do.. don't you think?!?


My husband and I bought this solid wood island at an unfinished furniture store for our first house years ago, we were so proud of our first DIY project staining it (who knew that would be the start of all my crazy projects?).  But now, two moves and two kids later this island just wasn't doing anything for me so I decided to give it a little makeover.  


So here it is the before and after, now in its new home near our front door.


To get from blah to beautiful, I painted the entire piece black.  I used a can of black paint I had on hand, but you could totally use spray paint.  Then I painted a coat of red, for this I did used spray paint.  I like how smooth spray paint goes on and how quickly it dries.  The coat of red can be light since you will want some of that black to show throw after a little distressing.


Once it was dry, I used a piece of sand paper to rough up the edges down the legs and across the entire top.  Just have fun, there is no science to distressing just keep sanding until you like the look.  I decided to leave the two drawers black, which I also painted black inside and out for a little contrast.


Next, I grabbed two new knobs from Hobby Lobby.  The picture doesn't do them justice, but they are a great aged red that look as if they have been distressed as well, a perfect compliment to the island if I do say so myself! :) To finish it off I sealed it with some Annie Sloan clear wax, my secret weapon for any furniture project... OK maybe not so secret!


Thanks to a little paint, instead of being destined for donation it now has a new fabulous life in our home.  That is for a few years until I get bored and paint it again, but don't tell my husband that!  

Enjoy,

Friday, May 31, 2013

DIY Rustic Western Dresser TV Stand


I'm at it again!!!  Last year I showed you my first attempt at turning a thrift store dresser into a TV stand (tutorial here), it's in our living room and we still love it! In fact I've received so many compliments on it, I made another as a gift!  But this time I decided to go for a two toned, more rustic look and tried a few new ideas and I couldn't be happier with how it turned out. 


This is the dresser after I gave it a coat of ivory paint and sanded the edges (it was originally a scratched, faded, water stained blonde wood color).


Then, I took out the top drawers, including the metal runners.  In this dresser the shelf or layer under the drawers was very thin and dipped down so to even everything out, re-enforce the shelf and make everything look a little more polished I cut a piece of bead board that I had left over from another project and nailed it in place.  Next, because I found some amazing turquoise knobs at Hobby Lobby that look like big chunky pieces of actual stone I removed the old drawer pulls and filled in the holes with wood filler. 


I liked how the ivory looked but I decided it needed something else so I painted the top of the dresser, the entire bead board shelf area, as well as the drawer fronts and the inside of the drawers a deep chocolate brown. 


 Then I drilled new holes, added the fabulous knobs and cut a small hole in the back of the dresser just above the bead board shelf for the DVD and satellite box cords.


Finally to seal it all and add a little rustic antique effect, I used one coat each of Annie Sloan clear and dark wax (I love that stuff).


So much better than some boring generic TV stand.. don't you think?!?  These are so fun to make, my husband better watch out or I'll soon have one in every room!

Enjoy,


Thursday, May 30, 2013

$1 Wood Frame Easy DIY Father's Day Gift


It's almost Father's Day and if the guy in your life is anything like mine, he is impossible to buy for especially when I'm trying to think of things for the kiddos to give him.  Their piggies banks (or Mommy's for that matter) can't quite cover an Alaskan hunting excursion so I came up with this quick and easy little frame and he LOVED it! 


It all started when I saw these wood frames at Michael's for $1.  They are wood so I knew I could paint them or let the kids do something with them to make it personal, but then I remembered that I had a sack of letter tiles that I bought for a project and never used and this gift was born.  Just a tip if you are ordering the scrabble tiles online make sure you get a "complete set" and not just random tiles, I made that mistake, couldn't spell anything and had to order more.


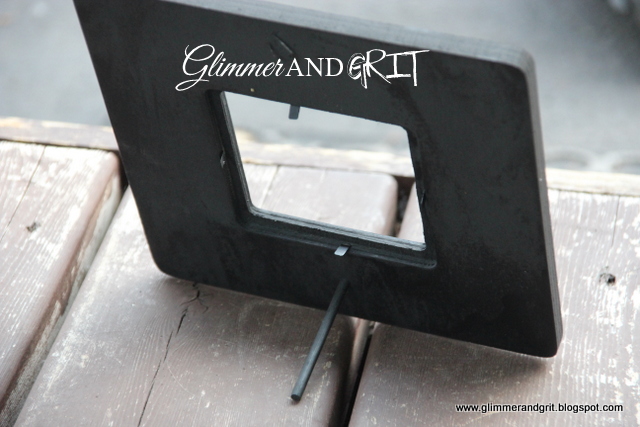
To get started the entire frame got a couple quick coats of flat black spray paint.


Even the back and the little stick that it rests on became black to help it look finished from all sides.


I love this picture of my two favorite Carhartt models, so I knew that would be the perfect picture to go inside and since they are "best buddies" this is what I came up with.  But the words and where you place them are totally up to you.  A little glue to hold the tiles on and you are done. So if you are in need of a quick last minute gift, this one is perfect!


Wow, do I love those two :) Happy Father's day to all the great Dad's out there who are hero's to their kids too!!!

Enjoy,


Wednesday, May 29, 2013

DIY Rusty Metal Saloon Sign


After some amazing family time this procrastinating blogger is back with a fun new sign that I hope will make up for my recent lack of posts!!  It's rusty and easy.. am I winning you over yet !?!  I sure hope so! 


To get started you need some big, cheap letters.  I got these at Hobby Lobby for around a dollar a piece.   


Then I painted the back, front and sides with black paint, any that you have or can get your hands on for cheap will work perfect. Next I put a very thin coat of bright red paint just on the front.  Once the red dried I used a piece of sandpaper to distress the paint a bit and let some of the black show through.


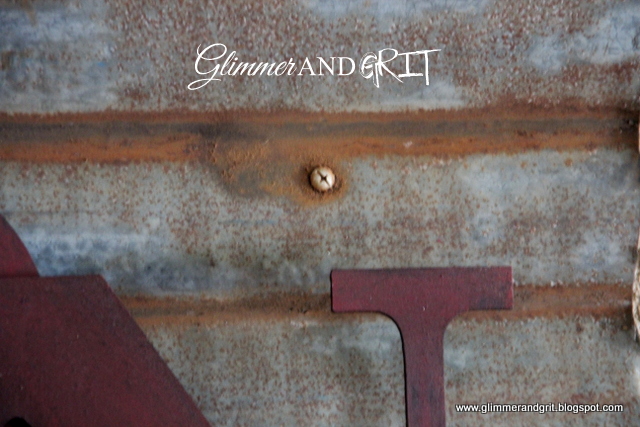
The tin is a chunk of a larger piece that I got for free.  It came off of an old barn and was covered in dirt and rust, just the way I wanted it.  Sorry no pictures for this step, but next I dusted off the loose grime and used tin snips to cut down the big piece to something more manageable.  Using tin snips is a bit of a pain and slow going but since I got the tin for free I won't complain.. at least not for too long!  

(

To attach the letters, first I arranged them overlapping each other in a haphazard way then used small dabs of gorilla glue to attach the wood letter to each other (small being the key here, this stuff expands so a little goes a very long way).  Once the letters were secure I used more gorilla glue to attach the wood to the tin.


You could finish this off with some old barn wood around the edges to form a frame, but I wanted to get this up and just didn't feel like measuring so I drilled two holes in the tin near the top about 6 inches in from each side.  Then I put a screw through the front and used a bolt on the back to keep it in place, this gave me a spot to securely wrap some picture hanging wire and hang it on the wall.  But the shiny, new screw looked out of place so I did what any good DIY'er does and "googled it" .. did you know that cinnamon sprinkled on glue (I used a spray adhesive) dries and looks like rust??  Me either!!!  But it works just dab or spray the glue where you want there to be a rust spot, sprinkle on some cinnamon let it dry, dust off the excess and like magic the area looks aged.  The best part is you don't have to be very precise just spray and sprinkle the messier the more realistic I think.. oh and it smells great!


In a very short time this too could be in your house!  


In our house the sign is above a hutch I found on craigslist that was in pretty rough shape.  But a fresh coat of flat black paint, a little distressing, a few upholstery tacks and some booze later, we now love our little Saloon and hope you do too!

Enjoy,


Monday, May 20, 2013

Reclaimed Wood Coat & Key Rack


One of my friends and my local "partner in crime" is undergoing a huge house remodel and she was kind enough to give me some of the great old wood that she and her husband took off of their house.  As soon as I got my hands on this chunk I knew I wanted to do a quick project for the space just inside our front door to drop my junk and maybe save myself time and sanity looking for my keys.  So this simple coat and key rack was born and it took maybe an hour!!!


I did a similar project last year on a piece of pallet wood to hang necklaces (tutorial here), but this time I wanted to add paint.  I'm a bad bad blogger be because I forgot to take a picture of the wood before, but it was covered in chipping white paint so I brushed off the paint that was really loose and then covered the top and sides with a dark chocolate acrylic paint (the cheap stuff in the small bottle for under a buck) and once it was dry I lightly sanded the stop letting the white paint underneath shine through.  To finish off the paint I added a little Annie Sloan dark wax to give it some extra character, but that step is totally up to you.


Then pick some random knobs, drill some holes, add a couple claw hangers on the back and you are done!  I chose  inexpensive knobs from home depot in different metal finishes, but Hobby Lobby is also a great a place for amazing knobs!  We just got one in my area (after I made this) and I will never buy knobs anywhere else EVER AGAIN!!!


This could not have been easier or less expensive, unless someone gave me a coat rack I guess!


Plus, it is the perfect addition to my entry with the great old school desk that I scored at an antique store for a few bucks because it needed a little TLC! After a good sanding and some fresh stain the seat is now a bench for the kids to sit and put on their shoes, the desk top is a shelf for bags and the new reclaimed wood coat and key rack gives us a spot for our coats and my keys that are always disappearing!


Not too shabby for a nap time project!!!  Hope you like it!

Enjoy,


Tuesday, April 23, 2013

Creamy Dreamy Coconut Dessert


My sweet next door neighbor is 89 years young, full of stories (she had 10 kids!!) and amazing recipes.  She made this Coconut Torte, as she calls it for my husband to welcome us to the neighborhood and I'm not joking not only did he eat the entire thing, I'm pretty sure he licked the plate when he was done!  It's creamy, dreamy and the delicious crust adds the most amazing texture.  So after months of visiting her and growing more in awe of how she managed such a big family I finally remembered to ask her for her recipe which she graciously gave me out of an old family cookbook.  I immediately ran home and made it.  After devouring an embarrassingly big piece of this heavenly treat, I'm now in a food coma and I'm sharing it with you all so you too can be in sugar bliss!


Ingredients

Crust:
1 1/2 cups flour
2 cups walnuts
1 stick butter

1st Layer:
8 oz. cream cheese
1 1/2 cups powdered sugar
1 container Cool Whip
1 cup coconut

2nd Layer:
4 small packages instant coconut pudding mix
6 cups milk (use part half and half if you are feeling really decadent)

3rd Layer:
1 container Cool Whip
2 cups flaked coconut


For the crust, mix the finely chopped walnuts, flour and melted butter and then press firmly into an even layer in your cooking spray coated pan and bake at 350 degrees for 15-20 minutes.  I used a regular 9x13 glass cake dish which is great if you need to make this for a crowd because it makes a lot.  But, if you have little to no willpower like me you may want to split it into two smaller pans and share one with a friend :) Getting this out of my house is the only way I can get it out of my mouth!!! 


While the crust is cooling you can mix up the next layers.  For the white cream cheese layer, cram the softened cream cheese and powdered sugar until smooth then stir in the Cool Whip and coconut until combined.

For the pudding layer, whisk together the milk and instant pudding and set aside until thickened.  You are basically following the pudding package directions but instead of using 8 cups of milk for 4 packages you are using only 6 so it is extra thick and rich.  If you happen to grab the cook and serve coconut pudding instead of the instant (which I did), don't worry just cook the milk and pudding mix on the stove according to the directions and let it cool, it takes a little longer but will taste the same.

Now that your crust is baked and cooled, smooth on the cheese layer, then the pudding layer and finally top off with the last container of Cool Whip and sprinkle with the rest of your shredded coconut.  Pop it in the fridge to fully set and enjoy.  This keeps great in the fridge for several days, so you can totally make it ahead to save yourself time on the day of a get together, but beware you may have to hide it way in the back because if anyone sneaks a taste, keeping them out of it may be nearly impossible!  I'm speaking from person experience!!!  


Yes, there are a few steps, it is very rich and the ingredients make this a little more expensive than your average dessert, but for a special treat this is well worth the time and money.

Hope you love it as much as we do!

Enjoy,