Monday, July 30, 2012

Painted End Tables

I found two of these 70's end tables for a steal a few months ago and as you can see they have been gathering dust in my garage until I finally got around to tackling them.  They aren't anything fancy but for the few dollars I invested I thought with a little paint and one nap time they could work in my guest bedroom. 
 I've never really been that find of yellow, but recently I've been seeing bright yellow with gray and I keep coming back to that combination.  So I decided this would be a good place to try out a wacky color.  I used the brightest yellow spray paint I could find at Home Depot, Rust-oleum in Sun Yellow.  
 Two cans of spray paint, two tables and two hours later this is how it turned out!
The room isn't done yet, I still need to work on the headboard and add so fun pillows but it is a start. From the 70's to sunshine for a few bucks, not too bad huh?!?

Hope you like it!

Lindsey :)

Thursday, July 26, 2012

No Bake Peanut Butter Pie

If you are in need of a quick dessert or just need a quick sweet fix this is the treat for you.  You can throw it together in a just a few minutes and you don't even have to turn on your oven!  But beware you will be tempted to eat the whole thing, so make this only when you have friends to share it with or you will hate me for ruining your diet :)
 No Bake Peanut Butter Pie
1 cup peanut butter
1 cup powdered sugar
1 package softened cream cheese
(I used fat free because it makes me feel better about the other million calories but any kind works great :)
1 tub cool-whip
1 teaspoon vanilla
1 prepared graham cracker crust 
Homemade Magic Shell (recipe here) or melted chocolate to drizzle (optional)
Directions:
To make mix first five ingredients with a hand or stand mixer, spoon creamy goodness into your prepared crust, drizzle with chocolate and then put in the freezer to set. This happens really quickly, in just 20 minutes or so it's nice and firm!!!
Serve straight from the freezer.  Don't worry it doesn't freeze solid, the freezer just keeps the pie cold and gives this treat a silky texture.  Yummm!  Trust me this could not be easier and your family will think you slaved away for hours.  Milk the sympathy for all it's worth and have an extra piece of pie for all your "hard work". 


                                                                    Enjoy, Lindsey :)

Monday, July 23, 2012

Bold Color 1 Hour Chair Makeover


In my quest or more accurately "my addiction" to re-do everything in sight I decided that I needed a few pops of color to liven things up.  My first attempt literally took less than an hour and turned out so cute.
I found this gem at a thrift store for $4.
The wood frame was pretty banged up and the seat fabric was beyond help, but overall it had some character so I grabbed some bright blue spray paint, a piece of drop cloth for the seat and in less than an hour the chair was finished and I think looks one million times better :)
Not too shabby huh???  
The seat easily unscrewed from the base and thankfully the foam under the awful fabric was in good shape so I added a little batting over the top of that for a some extra softness and then used a scrap piece of good old drop cloth (my favorite, inexpensive fabric) and 
stapled it all on.
Once the spray paint was dry I screwed the seat back on and this project was done during one nap time with time for an iced coffee break and a DVR'd project runway.  Now that's a productive afternoon :)
I'm going to use some bold print fabric I found to make a fun pillow for the chair next,
but for now I'm loving the bright color in our new casa.
Hope you like it!  Grab some bold paint and transform something pronto :)

Lindsey 
xoxo

Wednesday, July 18, 2012

Magic Shell In One Minute or LESS!!!

Good morning dear followers, my name is Lindsey and I have a dark confessions to make.  Up until recently my will power toward a certain sweet was pretty well in check, but over the last year CHOCOLATE and I have entered in to a dangerous affair and as a result I have lost all sense of reason or self respect!  It's a LOVE, LOVE, HATE kind of relationship.  I love the sweet silky goodness, it loves to take up permanent residence on my thighs and I hate the consequences :( 
That being said... lets make an over the top chocolate treat!!!!  HAHA... I know I'm a sicko, but hey at least I'm owning it... not so slender thighs and all :)    
If you have never had "Magic Shell" you are surely missing out (oh and your thighs are probably Swimsuit Illustrated worthy, but what fun is that :).  I mean what is better than ice cream??? Well in my world, that would be ice cream that has chocolate on top that "magically" hardens of course :)  The stuff you buy at the store is tasty but I always wondered what kind of crazy preservatives and chemicals were in to do and last as long as it does.  Mind you that never stopped me from buying it, but in my defense I did think about it :)
Then I found a recipe online to make it at home... uh oh.... dangerous!

And it could not be easier.... all you need is Coconut Oil and chocolate chips.  If you've never heard or used Coconut Oil, go buy some TODAY!  You can find it in nearly all regular grocery stores near the vegetable oil. This stuff is amazing and smells delicious.  You can not only bake and cook with it in place of other oils, you can also use it as lotion, lip balm and so many other applications.  A quick search of the uses will blow your mind!  My advice, buy two jars one for your kitchen and one for your bathroom, or divide one jar into two containers.  Your food will taste incredible and your skin will be silkier than ever and don't worry it isn't greasy it rubs into your skin really well and smells like you are on an amazing tropical beach vacation.  Bonus it will help smooth out those thighs after eating this treat :)
OK back to the "Magic Shell", I tested the recipes I found online for purely academic reasons of course :)  And I found that I like the consistency with a little more chocolate so I tweaked the recipe a bit.
One Minute Homemade Magic Shell
In a microwave safe container pour 1 1/2 cups chocolate chips and 1/2 cup coconut oil.
Basically a 3 to 1 ratio if you decided to make a larger batch for gift giving or hoarding :)
I think semi-sweet tastes best, but you could use any chips you like to make fun combos. 
Next put it on the microwave stir for about 45 seconds.
Pull it out and stir until the chocolate melts.

 Pour it in a cute glass jar or directly on ice cream (yes I broke out the "good china" for this :) and TA-DAH.... Magic Shell at home in under a minute!!!
You can store this in the fridge or a room temperature it's really your choice.  It's only oil and chocolate so it doesn't need to be refrigerated, but I do just because I figure it doesn't hurt.  The chocolate will harden once it had cooled so to use just pop the jar into the microwave for 30 seconds, give it a stir and pour to your hearts content.  Because of the re-heating I think the little glass jam jar works great, but use whatever you have.
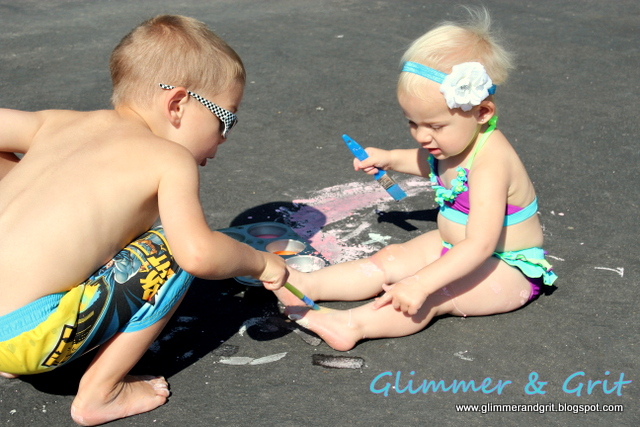
My little munchkins where more than willing to once again be my guinea pigs...
and they were so content there was an almost disturbing quiet in my house until the treat was completely gone.. and we are talking "lick the bowl" gone.  Oh so this is what houses without small kiddos sounds like..... ahhh a brief break in the chaos is kinda nice.

Hope you like it too!

Enjoy, Lindsey

Monday, July 16, 2012

DIY Kids Pavement Paint

Summer has FINALLY made an appearance in our neck of the woods and we are attempting to not waste a single second!  Thankfully our kiddos LOVE to be outside, but managing the chaos while still keeping them entertained can be a challenge.  So I decided to try a super easy, fun Homemade Pavement Paint and it was a huge hit!  What took me about 2 minutes to make turned into an activity where there was no fighting... gasp big shocker I know and they are begging to do it again!
To make just mix equal parts cornstarch and water.  I mixed it right in a pyrex measuring cup for easy pouring and less dishes to wash.. lazy yes!  But in my advance state of delusion I like to think of it as efficiency :)
I used one cup cornstarch and one cup warm tap water.  The warm water seemed to help mix the cornstarch a little better, but any temperature will work.
Now because we are in that "I want it only if she has it" stage, instead of sharing a "palette" I decide to avoid at least one crisis for the day and used two dollar store muffin tins... one for each little Picasso.  The one cup cornstarch/one cup water mix was the perfect amount to fill the 2 tins (12 cups) half full, which seemed to be perfect for carrying (I'm known to be a bit messy) and painting.
To make the colors just grab some food coloring and let your inner mad scientist out :)
  I used cheap grocery store food coloring and added one drop at a time until I got the colors and combos I liked, but you could go as bright or pale as you like they all looked great on the pavement.  I also decided to leave one cup white (no color) and I'm so glad the kids really liked how well it showed up on our dark asphalt. For really bright colors double the amount of drops per color.
For brushes I grabbed this large bag of different sizes from the craft aisle at Walmart for a few dollars.  I gave each kiddo a couple different sizes and saved the rest for other projects.
In seconds the whining stopped and my little artists where deep in design mode.
No fighting, just peace.... who knew cornstarch had such calming properties :)
Oh and did I mention they had a blast!
Thumbs WAY up!
Mixing for just the right shade they painted everything in site....
including eachother :)
Who needs a sidewalk or driveway when you have a perfectly good leg....
or belly near by???
Cooperation thanks to cornstarch... this mommy is one happy lady!!!
Mix some up today, grab your cup of coffee and if your house is anything like mine enjoy some rare 
moments of peace :)

***Oh and a bonus the cleanup could not have been easier, just hose off the paint tins, brushes, pavement and the kids (hence the swimsuits :). No stains or mess will be left behind just fun memories and little kiddos begging you to do it again!

Enjoy, Lindsey 

Thursday, July 12, 2012

Hope Chest

This cool old Lane Cedar Chest from the 50's was my grandmothers. "Grammy" received this as a gift when she was a teenager, it always meant a lot to her and she meant the world to me so I was thrilled to take it when my mom offered it to me earlier this year.
Unlike most of the furniture you buy today, it is solid and sturdy even after all these years, but it had seen better days.
Water stains, scratches and fading were holding it back from being special again so with my mom's approval I decided to paint it. I know some people will think painting a nice wood piece of furniture is blasphemous, but I thought it was worth the risk to make it something that I could use and enjoy everyday like my "Grammy" had.
So I sanded and primed the entire piece to cover any stains and blemished, then painted on two coats of Behr paint and primer in Moonlight White.

Then with a combination of sand paper and steel wool I distressed the top and corners to give it a little personality.
I love how it turned out and am so excited to have it at the foot of our bed.
It's great for extra storage and takes the place of a foot board.  (These are pictures from our old house, I need to update with some in the new room .. it looks even more amazing in there :)
Hope you like it!  

Lindsey :)