Monday, October 29, 2012

DIY Clark Kent/Superman Kids Costume

Not to be left out, my little man needed a costume too and since we are superhero crazy these days the idea of being Superman got a big thumbs up!  But I didn't want to mess with trying to recreate the spandex "superhero" outfit, so instead I went for a different twist and did a Clark Kent/Superman mash-up and it was a massive hit! The kids loved it and parents were stopping us taking pictures so they could try it next year so I guess it turned out OK!!!
My starting point had to be the Superman symbol.  I found this classic red and yellow logo just by doing a quick google image search.
Once I printed it out full sized, I put a piece of bright yellow felt under a piece of red felt, cut out the outline, and then with the stencil pinned to the red piece I cut out the areas I wanted the yellow to show through.
Now for the cape.  I want to preface this by saying I am no master seamstress in fact I am a true beginner so there probably are more efficient ways to do this, but I just kind of winged it and I guess this is proof if I can do it so can you!  Ok enough nonsense, to make the cape I took an XL red t-shirt I had in my stash, folded it in half and layered than on top of a piece of red satin the same size also folded in half.  I cut off the bottom hem of the t-shirt and just under the collar, and then cut down the sides of the t-shirt to make two square of the cotton.  You only need one of the t-shirt piece and one piece of satin the same size.  The other piece of t-shirt you can use for another project or save it to make a strap to tie the cape on later.  You could use just the t-shit or the satin but I wanted it soft on one side and shiny on the other, plus the two layers give the cape a little more structure which I think looks great.
Now pin on your Superman symbol to the right side of the satin piece, centered near the top and sew along the outside edge and along all the areas you cut out to expose the yellow.
Next, lay the t-shirt upside down so the right sides are facing together and sew along the outside edges leaving the top corners open to turn and create a space to run your neck tie or strap to attach the cape. I cut a small triangle section off of each corner, turned the raw edge under and sewed along that edge just to finish it off and help the cape gather better around the top.
For the costume I used Clark's necktie as the strap to hold the cape on, but sine the kids plan to use this beyond Halloween as part of a new dress-up station I'm working on I did cut a piece of elastic and added a few small pieces of velcro so that it would be easy to take on and off whenever my little "superhero" feels the need.
To finish off this costume I bought a superman t-shirt at Walmart.com, the lunch box is from Target, the glasses are reading glasses from the dollar store that I just popped the lenses out of and the name tag I grabbed from the church nursery last week.. I asked I promise :)
The khaki pants and belt we already had, but the tie and long sleeved shirt I found at a thrift store for 50 cents each!  As you can see my little guy was totally feeling his costume!!!
Unlike little sister's No Sew Girly Ghost costume, this did take a little sewing but it was soooooooooo worth it!  At least for one night my amazing little guy felt like a superhero and because he loved his costume so much he thought his Mommy was "the bestest ever" (a direct quote) for making it just for him!  Wow does that make the effort worth it :)  
Happy Halloween from our house to yours!!!

Enjoy,


Sunday, October 28, 2012

DIY No-Sew Girly Ghost Costume Tutorial

I know this is a little last minute to be sharing a costume tutorial, but I waited until the very last minute to put this together so I figure if I can do it so can you!  So, if you still need a costume for your little cutie don't worry you can make this one in no time!
For the "Girly Ghost"  I found this google image (don't you just love the lashes?!?), printed it full sized on a regular piece of paper... 
cut out the eyes and mouth and used them as templates for the black felt face.
 Since I wanted to make this a "no sew" project I just used double sided tape to stick the felt pieces to a white t-shirt (this cute ruffle edged one I bought at walmart for $3, but you could use one you already have or a onesie).  The tape worked great and after the couple hours of fun, it came off with no problems and now we can still get some good out of the cute shirt.  
For the ribbon bows I picked up three different black and white ribbons, some with dots and some stripes to go with the tights and leg warmers and then used this great tutorial to make the layered bows.  For the headband I just hot glued it to a black headband and used an extra piece of felt on the underside to cover the glue and help attach it to the headband.  For the shoulders I just used safety pins, but you could use hot glue for the bows and the felt ghost face if you don't have other plans for the shirt.
For the tutu this time I used a trick I learned from Pinterest and found something that was the length I wanted the strips of tulle and instead of cutting each piece I wrapped it around, in this case my cutting mat (but you could use cardboard) which was about 13 inches, perfect to make a roughly 6 inch long skirt, then just cut the ends!  So smart and so fast!  To make this skirt I used two full spools of white tulle. 
I used the basic tutu method of folding the tulle in half and then looping it under the waste band (you can see a tutorial here), but this time to make it extra fluffy I used three strips at a time stacked on stop of each other.
Also, instead of using elastic for the waste I used an extra long piece of coordinating wide ribbon, make sure to leave plenty of ribbon on each end of your tulle knots so that you can tie a big bow in the back.
The adorable tights are some we got last year as a gift (I think they were from Crazy 8's), and the leg warmers are just long women's socks that I cut off at the ankle.  If you have a sewing machine do a quick zigzag along the edge so it doesn't fray, but if you don't or don't have the time no worries they will still be cute and no one will notice.
I'm so happy with how it turned out and it really was very easy.  Even though it isn't quite Halloween yet, we already did our trunk-or-treating a few days early and can report that this costume was a HUGE hit!  
And the little ghost loved it too!  So if you are looking for a cute, creative costume but don't want to sew this may just be the answer!

Enjoy,

Thursday, October 25, 2012

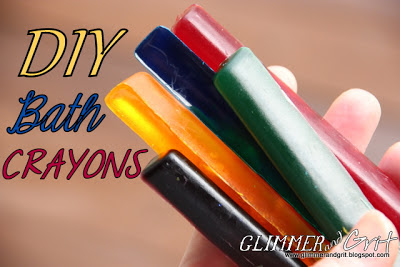
DIY Bath Crayons

Bath time in our house is a big deal the kids love to play in the water and drench anything in site, and that time of night means it's almost bed time, a.k.a. a little quite time for Mommy and that also makes me happy, happy, happy!!!
When the kiddos aren't flooding their bathroom with rouge splashes, drawing in the tub is the next best thing and it takes a lot less towels to clean up.  The kids love their bath paints we made, but the crayons are a fun change so I decided to give them a try.  During a recent trip to hobby lobby I finally saw some glycerin soap and picked up a bag.  This big bag was less than ten dollars and with a coupon only six, which is about what one small package of the bath crayons costs and this will make about ten times as many.  For the colors I bought some fun bath soap dyes at Michaels for around three dollars, I also I grabbed some regular cheap food coloring to compare results.  The silicone mold is from IKEA, (but I bought it on ebay) you could use any candy mold you have in any shape.  I liked the long pencil like shape of this one, I thought it would make the crayons easy for little hands to hold.
This glycerin already comes in cubes which makes this extra easy.  I just put a few cubes in a glass measuring cup, microwaved it for about a minute and believe it or note, even though you just got started you are almost done!
Next, just for fun I added a few drops of cinnamon vanilla essential oil I had left over from making sugar scrubs, but that is totally up to you.  Now comes the color.  Every recipe and tutorial I could find on making bath crayons suggested to use the special soap dyes and to go easy on the color, just a drop or two then pout into the molds so that's what I did.
 About an hour later I was so excited when I popped them out of the molds, aren't they pretty?  Problems is they don't show up on the tub, which sort of defeats the point of the project.
 So I melted a couple more cubes of glycerin and this time ditched the soap dyes and used my cheap old grocery store food coloring.  My advice be heavy handed with the food coloring!  It will look super dark and you will probably have visions of a blue stained tub for life, but in order to see your little artists creations you need lots of the color.  This is what they look like once they cool and harder... pretty great right?!?
These vibrant crayons were a HUGE hit in our house.  So simple and easy to make and I haven't had any problems with stains even with the ridiculous amount of food coloring I used!  I'm guessing the soap helps keeps the color for doing any damage.  Test a spot on your tub just to be sure, but like I said we have gone crazy with these and had no issues.  I do make sure that the "artists" wipe off their "canvas" after each session so it's ready for next time... they think it's fun and Mommy doesn't have to go back and wipe it off later, that's a win win in my book! As a bonus when the colors get dropped into the water they turn the water fun colors too!!!

These are not only fun for your own kids, but I think they would be super cute wrapped up with some bath toys and a cute hooded towel as a gift!  Or just stuck in their stockings this Christmas!  Hope you like my latest adventure tacking yet another DIY project and that it inspires you to give it a try as well, if you do be sure to let me know how it turns out!

UPDATE:
We've noticed that if you throw all these crayons together in a cup or basket like we do while wet they may stick together when they dry.  To fix this lay them flat or just dunk them in the water to separate at the start of the next bath art session :)

Enjoy,


Tuesday, October 23, 2012

Vintage Buffet, Big Reveal

I found this mud covered, forgotten piece of furniture behind an old shed at one of my favorite local antique stores.  It had seen better days and thanks to the elements and years of neglect I thought maybe it was too far gone even for me!  But thanks to a little encouragement from my fabulous sister in law I bought this gem with the hopes ot giving it a second chance.
And I'm so excited with how it turned out! Believe it or not getting here really wasn't that bad!!! A good scrub and de-bug, a little drying time, paint, wax and some new knobs plus lots of iced coffee for this procrastinating project queen... and the buffet went from forgotten to a star in our house!
As you can see the top was rough, stained, dirty and definitely not loved for a long, long time.  But the "bones" were great and under the goo and gunk, technical terms are my specialty, the shape was exactly what I was looking for to go in my dining room.
To go from dirty to distressed beauty, first everything got a good scrub to get rid of the dirt, and dust so I could at least start with a clean surface.  Once the wood was completely dry I decided to skip the primer and just get to painting, for one reason I am impatient to a fault and second I don't mind if some of that "character" peaks through a little so why do more work than necessary?  Work smarter not harder, right?1? 
For the color I used Krylon spray paint in Pistachio.  After two coats all the imperfections were evenly covered, but the color was a little too bright for me so I covered everything in Annie Sloan clear wax, and then dark wax to give it that antique, aged look. 
 If you have never used Annie Sloan wax, you should.  It is a little more than other waxes on the market, but you don't use much and it's money well spent.  There are many great tutorials out there on waxing, missmustardseed has some of my favorites.
Finally some new brushed copper knobs for the drawers and two glass knobs for the two doors. These are just cheap knobs from Home Depot, because I refuse to pay more for the knobs than the furniture.. but that's just me!  Still, I think they look perfect for this project.
For my $50 dollar investment I think this gem is a keeper!  I hope this inspires you to grab an old piece of furniture, even if it is in really rough shape and give it a second chance.

Enjoy,


Wednesday, October 3, 2012

Mod Podge Photo Star Collage Tutorial

A dear friend of mine made me a photo star a few years ago for Christmas and I LOVED it!  It was a new, unique way to chronicle our first year with out little man and I really treasure it.  But now that we have our little girl I wanted to make a second star to include her so through a little trial and a few errors I figured out out how to make my own and wanted to share it with you.
To get started you need Mod Podge, 10 photos (I printed mine with a sepia tone to match the brown metal star but that's totally up to you) 2 sheets of scrapbook paper and a star (any size will work, but the bigger the star the more of your photo will show).
First you need to make a template for the sides of the star.  I used a piece of heavy card stock and traced the full side and then trimmed that down by 1/4 to 1/2 an inch on all sides.  The size will depend on the star you choose, by the way I found mine at Bed, Bath and Beyond, for cheap but they are pretty popular so most decorating sections have them.
I decided to use two different patterns of scrapbook paper, but that is totally up to you. You could pick bright colors and use colored photos, or black and white and black and white photos. I think coordinating the paper and photo color looks the best.  Because the sides are the same dimensions you only need one template, just remember to cut five with the template one one side, then flip it over and cut five more.. other wise your pattern will be on the underside of the paper of half of the pieces. That's what I did, cut ten all going the same way... oops!  So I ended up having to scramble to get more cut out of the little paper I had left, which if you loo close is why the pattern don't alternate. Oh well I figured out a fix and it in my eyes it still works.  To make life easiest, use a rotary cutter, a rule and a cutting mat, but if you don't have those good 'ol scissors work just fine. 
Next, use a small foam brush to apply a thin even layer of Mod Podge to the entire back of the paper pieces and press them down centered onto the sides of the star making sure to smooth out any lumps and bumps as best you can while the glue is wet. Once things are nice and flat and in place give the top of the entire star, including the tops of the paper pieces a coat of Mod Podge.
While that is setting use your same paper template to cut your photos.  The point of the template is going to be the widest area so I tried to use that as my guide to get the most picture possible on the star, trimming away any excess.
Once all the photos are cut and you are happy with the layout, put a layer of Mod Podge on the back of the photos and one at a time place them on the designated space on the star.
Finally give the entire star, photos and all another two full coats of Mod Podge.  This step looks scary like you are destroying your photos, but just keep the layers even and thin and have a little faith because it all dries clear and looks flawless.
Once it's dry hang it on the wall, stand back and admire your amazing work!
Mod Podge is some crazy stuff, I admit it is hard not to panic when you see how gloppy things look while it's drying but be patient and the end result will WOW you.  If this "Queen of Impatience" can do it you can too!
I hung the updated family star next to the original one and really love how it turned out.
This is my big collage wall in progress.... I have several more projects planned for this space so stay tuned!
But in the meantime, this is a quick, easy and inexpensive project that would be a great gift for the grandparents or a new couple covered with wedding pictures.  Way more fun and unique than just a frame!
So instead of letting them hide away on you computer, get all those great family photos out for everyone to see.

Enjoy,